
At first sight the period did not seem very promising. The Boer War is tarnished by memories of the very bitter struggles of the final parts of the Second Boer War, and remembered for a tough guerrilla campaign fought by both sides. This did not seem like fertile ground for enjoyable wargaming.
However, Richard Clarke and my other chums at Lard Island were undeterred. Undertaking a lot of research into the battles of Colenso, Spion Kop, the attempts to relieve Ladysmith and the campaigns cross the Tugela River, I’ve been privileged to enjoy some fine wargaming in which the bravery of the two sides and the difficulties of coordinating battles in the War have come through clearly.

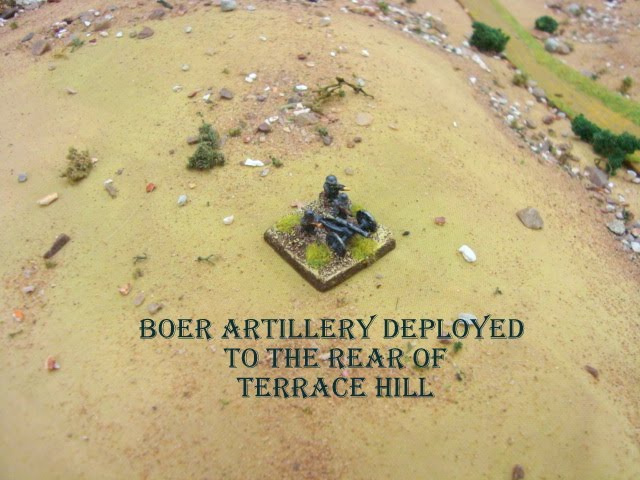
Last Tuesday we played through the battle of Terrace Hill, now renamed Hart’s Hill in memory of the engagement. Richard has posted a full battle report on his own blog, so I’ve not tried to rewrite his excellent summary of the wargame. I thought I would add a few additional photos here and also, as a play-tester, give a few thoughts on what sort of thing I like to look for in helping to play-test and develop a historical wargame.
The Battle of Hart’s Hill
Very briefly, the game focused on an engagement whereby the British commander, Major General Fitzroy-Hart, commanded his Irish battalions to launch an attack on Terrace Hill in the hope of turning the Boer defences and thereby allowing his fellow British commander, General Wynne to continue his advance across the Tugela River and onward to relive the strategic town of Ladysmith.

Fitzroy-Hart’s attack on the Boer positions started late in the day, with his Irish Brigade utilising the high banks of the Tugela to advance under cover to a point from which they could launch their attack on Terrace Hill.
The Boer defences were carefully sited and provided an inter-locking position, with Terrace Hill being supported by Boer forces on Hedge Hill, Railway Hill and Pieters Hill.
The Irish forces led by Fitzroy-Hart therefore faced a tough task, advancing upon a hill with little cover, under enemy fire. I played the role of Fitzroy-Hart, and was hampered by an in-built command and control disadvantage to replicate the “friction” within Fitzroy-Hart’s generalship. On the day, Fitzroy-Hart did not cross the Tugela River, being content to try and command the action through a series of bugle calls from the far bank. The historical result, in the noise and heat of the battle, was predictably disastrous.
With the other Irish Commanders, Nick and Big Al, we focused our attention on an advance of Terrace Hill, using a crack battalion of the Connaught Rangers which would follow up a bombardment on Terrace Hill by Naval guns deployed (appropriately enough) no Naval Hill.


I planned to shield the Boer positions on Hedge Hill and Railway Hill with other Irish battalions, which could advance purposefully and threaten the inter-locking Boer forces and disrupt their fields of fire.
The battle was pretty ferocious, with the flanking Irish battalions, the Dublin Fusiliers and Iniskillings, taking very considerable fire from Boer positions and artillery.


However, the sacrifice of the Dublins and Iniskillings made sure that the central assault, led by the Connaught rangers on Terrace Hill, was able to progress with few casualties until the key moment of impact.


Unfortunately, having taken the Hill, the Connaughts were unable to hold the position in the teeth of concentrating Boer fire, and fell back slightly, supported by Naval guns re-targeting the newly discovered Boer second–line of defences to the North of Terrace Hill.


You might be wondering at this point if there’s anything more to say, or perhaps why I chose the title “Play-testing wargames” for this blog post. I wanted to share a few of the things which interest me about play-testing and designing wargames, and how I approach that part of the hobby.
Being there: I like to read military history. My guess is, so do you! A good historian puts you, the reader, in a position of understanding the opportunities, tensions and challenges relating to the conflict in question. I like wargames which try and do the same. There has been a very interesting debate on the wargaming internet and forums in the first part few months about whether a wargame can enhance your understanding of history. I think that the jury is perhaps out on that (although my own personal view is that it has the potential to do just that). But even if my understanding of history is not enhanced, I like to feel that (however superficially) playing a wargame has somehow attempted to put me in the boots of those who were fighting historically and to better appreciate the challenges they faced.
What am I thinking about?: When I am play-testing a wargame, am I thinking about rules, dice, templates, measuring, additions or subtractions for basic values? Or I am focused on the relative merits of tactical approaches, formations, firing and assaulting? Of course, I do both at different times in a game, but I prefer games when I’m trying to think about the tactics of the period (and perhaps an umpire really helps here) than just thinking about how the rules provide advantages which are then sought by players.
The Road to Victory: I like to understand a game’s result and figure out why I won or lost. In play-testing, I also like to try and press the designer to explain the theme of the game, and how that theme relates to winning or losing a game. Where the intended theme, and my understanding of the reasons behind a defeat (or victory) are the same, the development of the game is probably going in the right direction.
In our game of Terrace Hill, Rich had identified a number of themes in reading about the historical battles of the Second War in advance of the games. The difficulty of co-ordination of attack and defence was one of these. In our game of Terrace Hill, despite my best efforts the British forces of Fitzroy-Hart struggled to coordinate an attack and found difficulty getting artillery and infantry to work in unison. This would be an example of where I feel that the theme which the designer had in mind has come through strongly in the game.
So there we have it. My views on play-testing a wargame. Not rocket science, but like a lot of simple things, difficult to do well. And perhaps most frustrating of all (at least for me) is play-testing historical engagements and making precisely the same mistakes as your historical counterparts .... week after week!


Great terrain and great game.
ReplyDeleteWhat rules are you using?
Emilio,
ReplyDeleteThanks for the comments. We're using our own set of rules written by Richard Clarke of TooFatLardies. I think they are going to be called "Kop That" (!). I think Rich is aiming for the rules to be available in the next month or so, so watch this space!
Sidney,
ReplyDeleteYour blog is one of my favorite places to go...your stuff is outstanding.
Bit of resurrection here but this looks so good...I have just finished painting about 200 odd 6mm Brit for the period and I can wait until these rules come out....great report!
ReplyDelete